Medical notice: This article is for general information; for detailed aftercare, see the What to Do After a Tick Bite? An Evidence-Based Guide page. If there is fainting, severe bleeding, shortness of breath, rapidly increasing pain, a high fever or a rash, seek care at a healthcare facility.
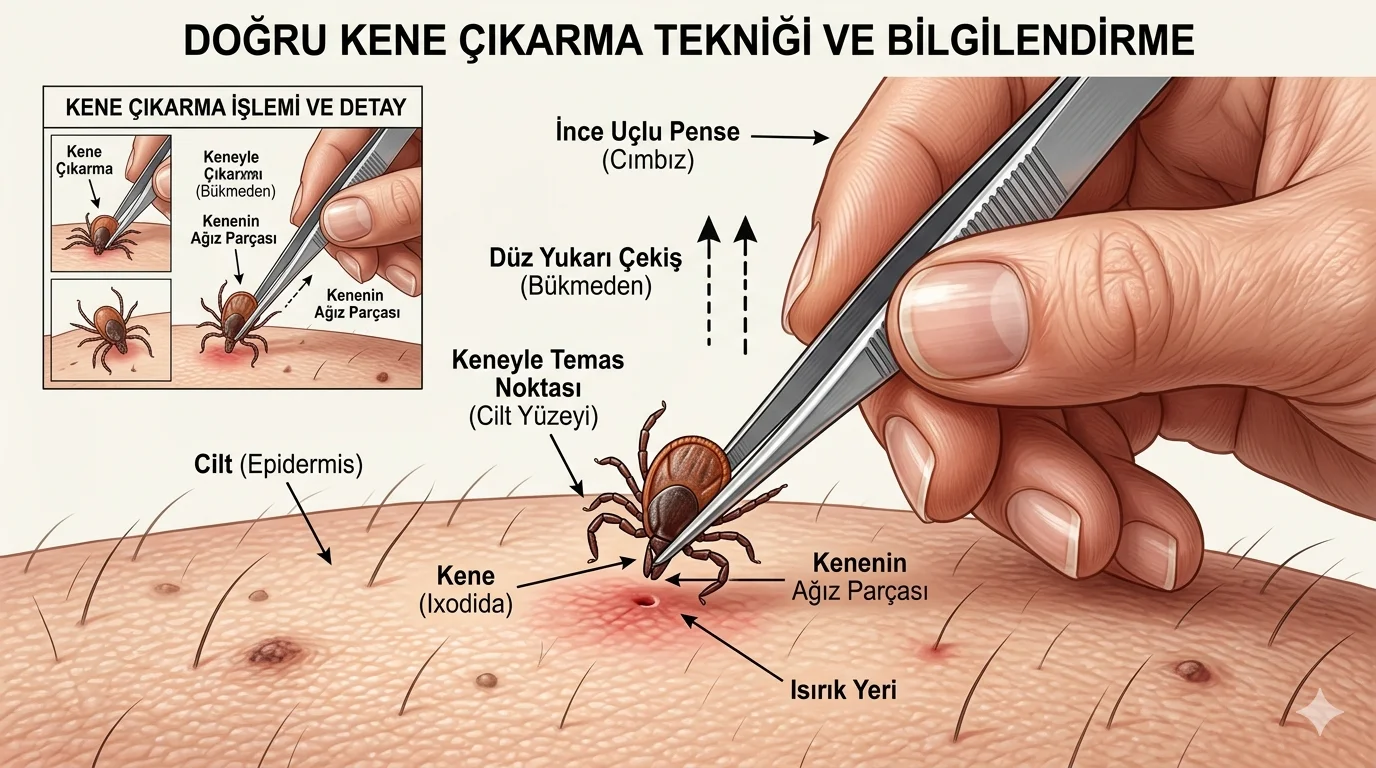
The short answer to how to remove a tick is clear: with fine-tipped tweezers, a tick remover or ordinary tweezers, grasp the tick at the point closest to the skin, pull straight upward and don’t twist. This method is consistent with the attachment logic described on the Tick: Biology, Life Cycle and Health Perspective page; for the steps you need to follow after removal, also see the What to Do After a Tick Bite? An Evidence-Based Guide page. The aim here is not brute force but a controlled removal.
There is one more detail to this: no matter how engorged the tick is, it is not right to pull it by the middle of its body. Your grip should stay close to the mouthparts at the skin; otherwise pressure applied over the body squeezes the animal and raises the risk of it breaking apart. The direction of the pull matters too: straight up. Pulling sideways, twisting or rocking it back and forth irritates the skin unnecessarily.
The most common mistake in the field is acting fast and trying to yank the tick out as if “rescuing” it. Yet good work here is slow and steady work. Use a small light source and, if needed, look with a magnifying glass. Areas such as the hairline, behind the ears, the nape of the neck, the armpits, the groin and the back of the knees are often missed. In children and in people who have contact with pets, these areas are checked more carefully. A small tick may seem absent at first glance; but with the right angle and light, you will notice it.
Another critical point is not to use unnecessary chemicals during removal. Apply antiseptic after the job is done; don’t put it on the tick during removal. Because the goal is not to irritate the animal but to detach it in one piece. The same logic saves time in the field and reduces messy intervention.
Why fine-tipped tweezers are the right tool
The tick’s mouth holds tightly to the skin. Thick-tipped pliers or your fingers can crush the body and ruin the job. Fine-tipped tweezers give you a grip closer to the mouthparts. That way you pull upward without straining the skin unnecessarily. A tick remover is also a tool made for the same job; but in the field the most commonly available and most practical solution is often fine-tipped tweezers. If you have ordinary tweezers, their tips should be fine; broad, splayed tweezers make the job harder.
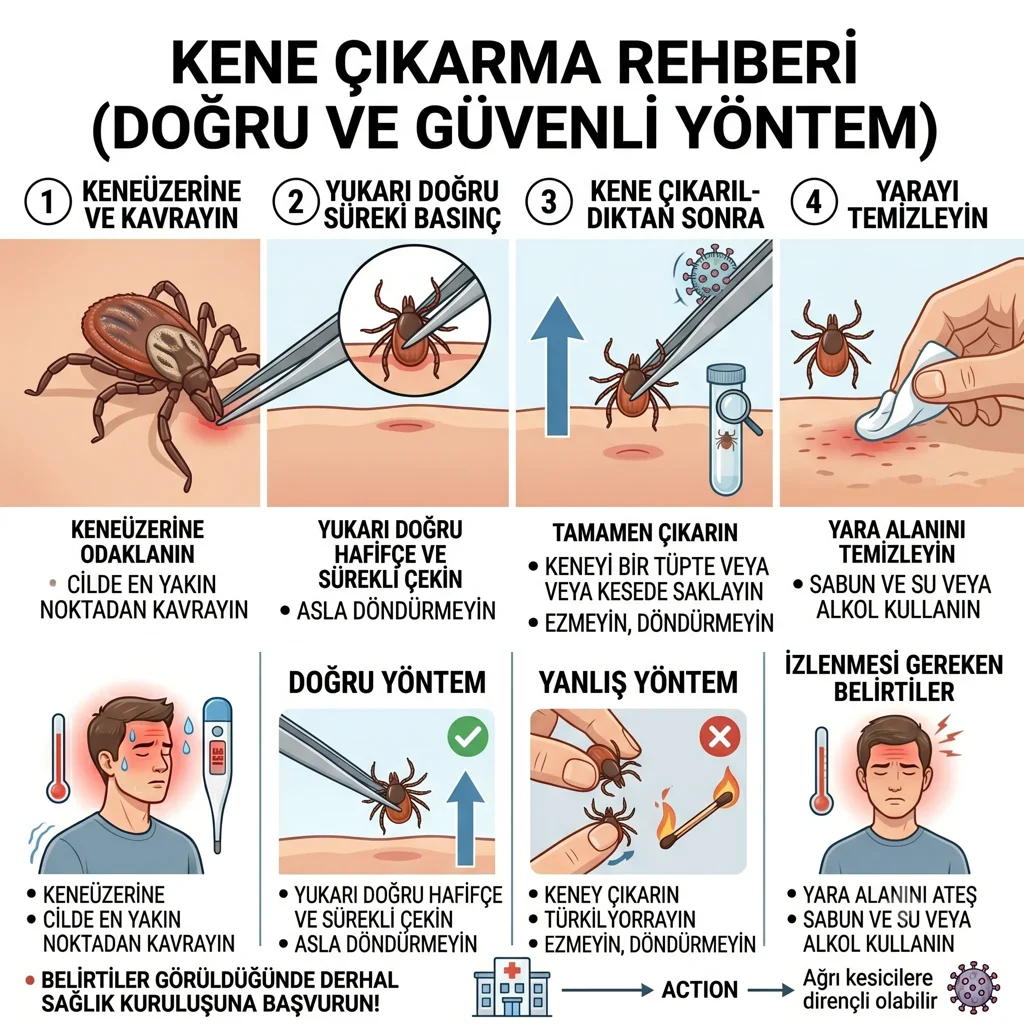
The basic logic here is this: don’t squeeze and agitate the tick, just hold it and remove it. If you squeeze this animal, its body contents can flow back, a piece can break off and the job takes longer. That is why “pulling” and “crushing” are not the same thing. The pull will be straight; there will be no rocking from side to side.
Step-by-step removal
- Wash your hands. If possible, put on disposable gloves.
- Position the fine-tipped tweezers so they grasp the tick at the point closest to the skin.
- Hold the area near the head, not the body.
- Pull straight upward with steady, even pressure.
- Once it is out, clean the area with soapy water, then apply an iodine antiseptic.
- If you wish, keep the tick in a closed container; note the date.
The trick is not speed but steadiness. A sudden pull can break the tick. Twisting and turning are also unnecessary. In most cases, a single clean movement with the correct grip is enough. If the tick won’t come out, don’t tamper with it any further; rather than forcing it, getting medical help is wiser.
Why the wrong methods are wrong
Attempts with oil, alcohol, petroleum jelly, cigarettes, matches and the like circulate like old home remedies. They are not correct. They disturb the tick, prolong the job and increase the chance of it breaking apart. Crushing the body in particular can increase the risk of transmission along with the tick’s saliva and gut contents. That is why the “suffocate it first, then remove it” logic doesn’t work.
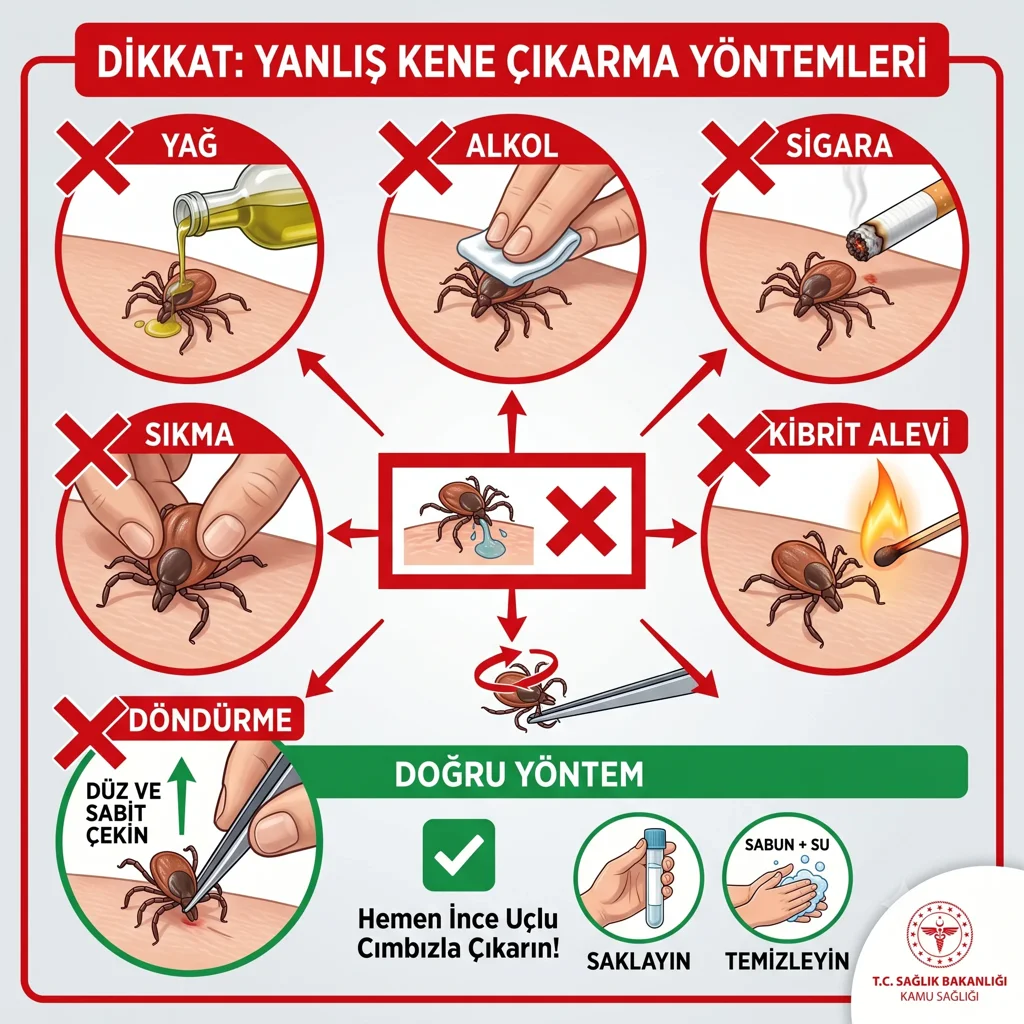
The common flaw of the wrong methods is this: instead of removing the tick calmly, they irritate it. Once the tick is irritated, control is lost. Your goal is not to chase the animal away but to separate it safely from the skin. That is why you should not pour alcohol on the tick, not apply oil, not bring a match near it and not press a cigarette against it. None of these is a safe way.
The CDC’s current guidance also emphasizes prompt removal and the use of fine-tipped tweezers; WHO, for its part, stresses symptom monitoring in tick-borne diseases. The common line of the official sources doesn’t change: the right tool, the right grip, a straight pull.
What to do after removal
The job is not finished once the tick is out. The first goal is to clean the area; the second is to monitor for 14 days. Watch for fever, weakness, headache, muscle pain, joint pain, rash, nausea, vomiting or bleeding. Especially if fever and rash come together, don’t delay.
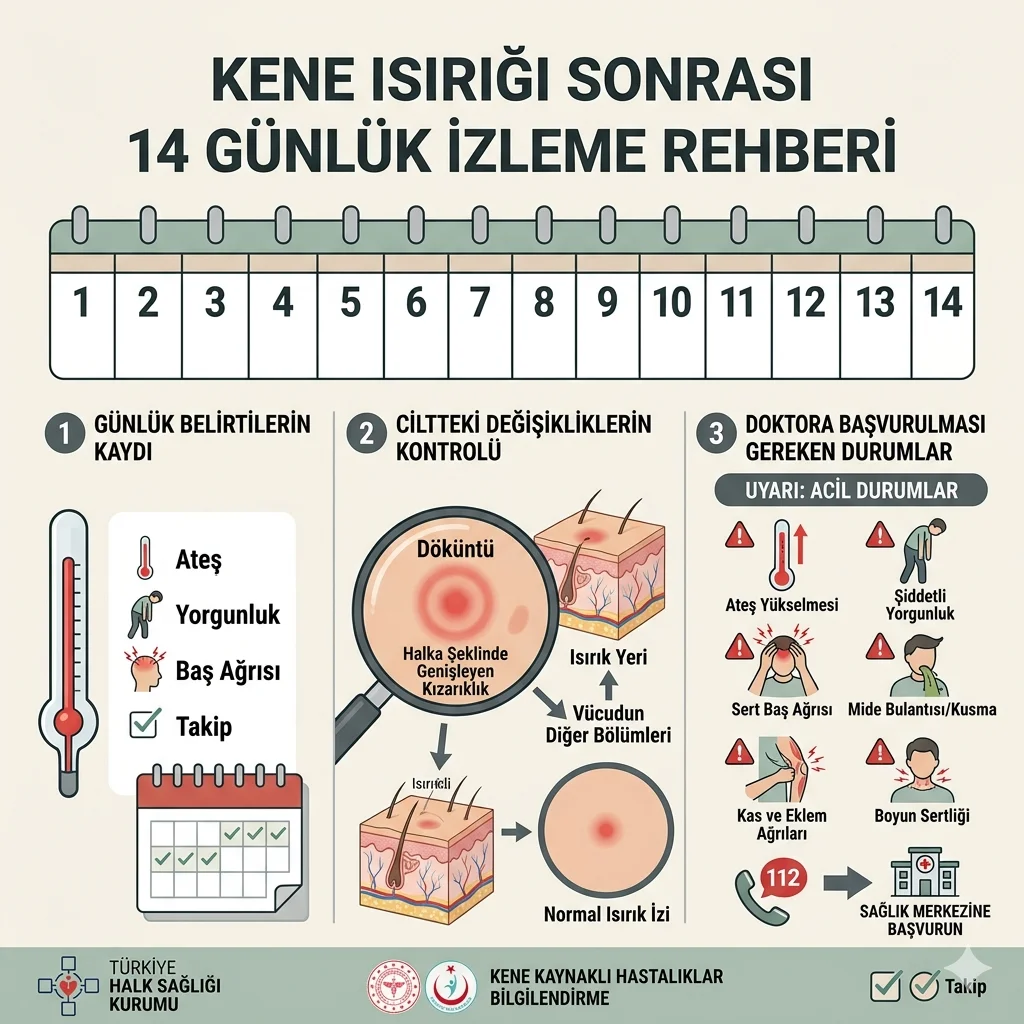
The question of keeping the tick comes in here too. Keeping it in a small, closed container or bag may be useful for a species assessment if needed. Still, don’t forget that your main job is not to collect a sample; it is to remove the tick correctly and monitor correctly. Write the date on the lid. Which day it was removed, which day the fever started, which symptom began; noting these makes the physician’s job easier.
Setting up a routine for follow-up is a good idea. Do a short check morning and evening: see whether there is fever, tiredness, headache, muscle pain, new redness on the skin, bruising or bleeding. If there are no complaints, that information is valuable too; because you won’t miss the line between “normal for now” and “getting worse has begun.” If you’re monitoring alone at home, also tell someone close to you; especially if fever and weakness have started, it becomes easier for the situation to be noticed.
An iodine antiseptic is a simple but sufficient step here. Don’t rub the skin excessively. Don’t dig deep with a needle to remove a leftover part. A little redness on the skin can be normal; if there is spreading redness, discharge, increasing pain or fever, a check-up is needed.
When to call your country’s emergency number
Not every symptom after a tick bite carries the same weight. In the following situations, don’t delay calling your country’s emergency number or getting emergency help:
- Fainting, clouding of consciousness, shortness of breath
- Bleeding from the nose, the gums, or in the urine or stool
- Rapidly increasing weakness and debility
- Deterioration of general condition together with a high fever
- A rash, bleeding and a severe headache occurring together
In a milder situation that still needs follow-up, a physician’s opinion on the same day is the better course. Especially if the tick contact happened in a rural area, if there is contact with livestock, or if the region is risky for CCHF, the waiting time is kept short. The issue here is not fear but time management.
Short checklist
- Use fine-tipped tweezers.
- Hold the tick at the point closest to the skin.
- Pull straight up.
- Don’t turn, twist or crush it.
- Clean the area and apply iodine.
- Keep the tick and note the date.
- Watch for fever, rash and bleeding for 14 days.
- If there are serious symptoms, call your country’s emergency number.
Sources
- CDC — What to Do After a Tick Bite
- WHO — Crimean-Congo haemorrhagic fever
- CDC — About Crimean-Congo Hemorrhagic Fever
The bottom line stays the same: when it comes to how to remove a tick, the safe way is tweezers and a straight pull, followed by 14 days of monitoring and watching for emergency symptoms. If your doubts grow, go to a healthcare facility.